Troubleshooting Common Paper Marbling Problems
Paper marbling is a truly captivating art form. The swirling colors, the unpredictable patterns – it's a joy to create. But, as with any craft, it can also be frustrating when things don't go as planned. This guide addresses some of the most common paper marbling problems and offers solutions to help you achieve stunning results.
Understanding the Basics: What Can Go Wrong?
Before diving into specific problems, it's crucial to understand the core elements of paper marbling. The process relies on several factors: the size particle size of the pigments, the viscosity of the carrageenan bath, the surface tension of the paper, and your technique. A change in any of these can lead to undesirable outcomes. Let’s explore them.
Problem 1: Uneven Color Distribution
The Issue: Colors appear blotchy, thick in some areas, and sparse in others. Your paper doesn’t seem to be taking the color evenly.
Possible Causes:
- Pigment Issues: Pigments are clumping, not dispersing properly, or are too coarse.
- Carrageenan Concentration: The carrageenan bath is too thin or too thick. Too thin, and the colors won't stay suspended; too thick, and they won't spread.
- Paper Surface Tension: The paper isn't properly sized or has inconsistent surface tension, leading to uneven color absorption.
- Technique: Your dropping or swirling technique isn’t consistent, leading to variations in color distribution.
Solutions:
- Pigment Preparation: Ensure pigments are finely ground and thoroughly mixed with a dispersing agent (like ox bile or dish soap, used *very* sparingly) before adding them to the bath. Test the dispersion by observing if the pigment remains suspended in a small amount of water.
- Carrageenan Adjustment: Experiment with the carrageenan concentration. A good starting point is 1-2 grams per liter of water. Allow ample time for the carrageenan to fully hydrate (often several hours, or even overnight). If you're still having issues, consider a different brand of carrageenan; some hydrate better than others.
- Paper Sizing: Use a paper that is already sized (like watercolor paper) or size your own paper. Sizing creates a barrier that prevents the paper from absorbing too much of the pigments.
- Consistent Technique: Practice your dropping and swirling motions to ensure a more even distribution of color.
Image: 
Problem 1: Swirling and Pattern Issues
The Issue: The colors blend together completely, resulting in muddy, indistinct patterns, or you’re getting patterns that are completely unexpected.
Possible Causes:
- Excessive Swirling: Over-swirling the colors causes them to merge.
- Color Compatibility: Some colors naturally blend into browns or greys when mixed.
- Temperature differences: Temperature differences between colors can influence how they interact.
Solutions:
- Minimal Swirling: Reduce the number of swirls and be more deliberate with your movements. Gentle, controlled motions are key.
- Color Selection: Research color theory and compatibility. Use a color wheel to identify colors that will produce visually appealing patterns.
- Temperature control: Try to maintain consistent temperatures for your colors.
Problem 1: Paper Issues
The Issue: Your paper curls excessively, refuses to absorb color, or tears easily during the marbling process.
Possible Causes:
- Paper Type: Using the wrong type of paper (e.g., uncoated bond paper).
- Paper Condition: Paper is damp or too dry.
- Paper Thickness: Paper is too thin and fragile.
Solutions:
- Paper Selection: Use paper specifically designed for marbling, such as watercolor paper or printmaking paper. These papers are typically absorbent and durable.
- Paper Moisture: Ensure the paper is adequately dampened *before* laying it on the bath. This helps it adhere to the surface and absorb color evenly. Don't let it become so wet it's falling apart though.
- Paper Thickness: Choose a thicker paper stock to prevent tearing.
Problem 1: The 'Frosting' Effect
The Issue: A fine, white, powdery residue appears on the paper after it’s been dried. This is sometimes called ‘frosting’.
Possible Causes:
- Excess Pigment: Too much pigment is used, leading to a surface buildup.
- Calcium in Water: Hard water contains calcium that can react with pigments and cause a residue.
Solutions:
- Reduce Pigment: Use smaller amounts of pigment.
- Use Distilled Water: Prepare your carrageenan bath with distilled or demineralized water to eliminate calcium.
Image: 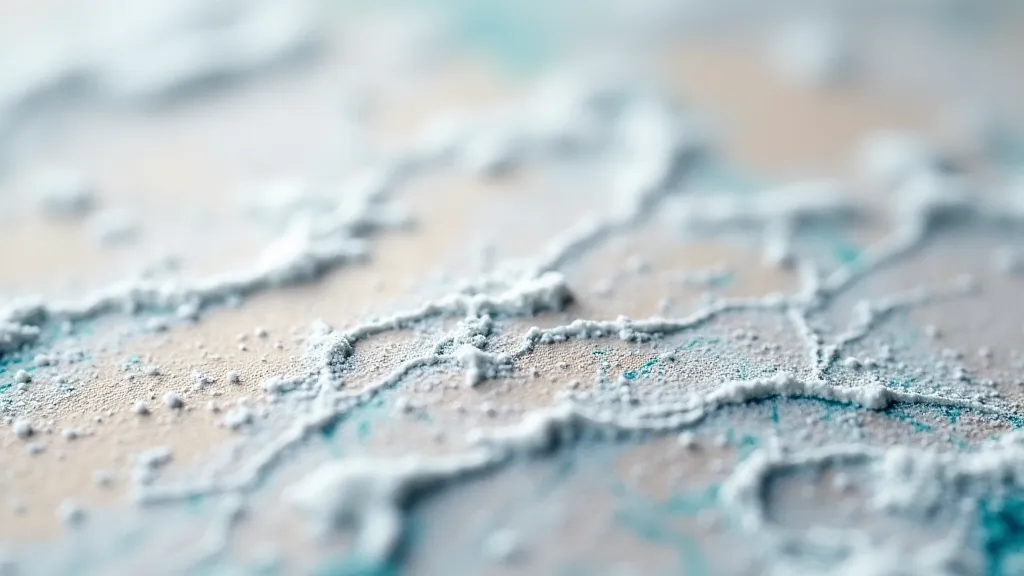
Problem 1: Color Separation and Bleeding
The Issue: Colors separate and bleed into each other uncontrollably, creating an undesirable muddy effect.
Possible Causes:
- Incompatible Pigments: Some pigments react negatively when combined.
- Insufficient Dispersant: Pigments are not properly dispersed, leading to uneven distribution and reaction.
Solutions:
- Careful Color Choice: Research the compatibility of the pigments you’re using.
- Ensure Proper Dispersion: Make sure each pigment is fully dispersed with the appropriate dispersing agent.
Problem 1: Unexpected Patterns
The Issue: The patterns you're getting are consistently different from what you expect or desire.
Possible Causes:
- Bath Consistency: Slight variations in the carrageenan bath's viscosity or surface tension.
- Room Environment: Changes in temperature or humidity affect the bath's properties.
Solutions:
- Careful Bath Preparation: Ensure consistent measurements and hydration times for the carrageenan bath.
- Controlled Environment: Try to work in a space with stable temperature and humidity.
Image: 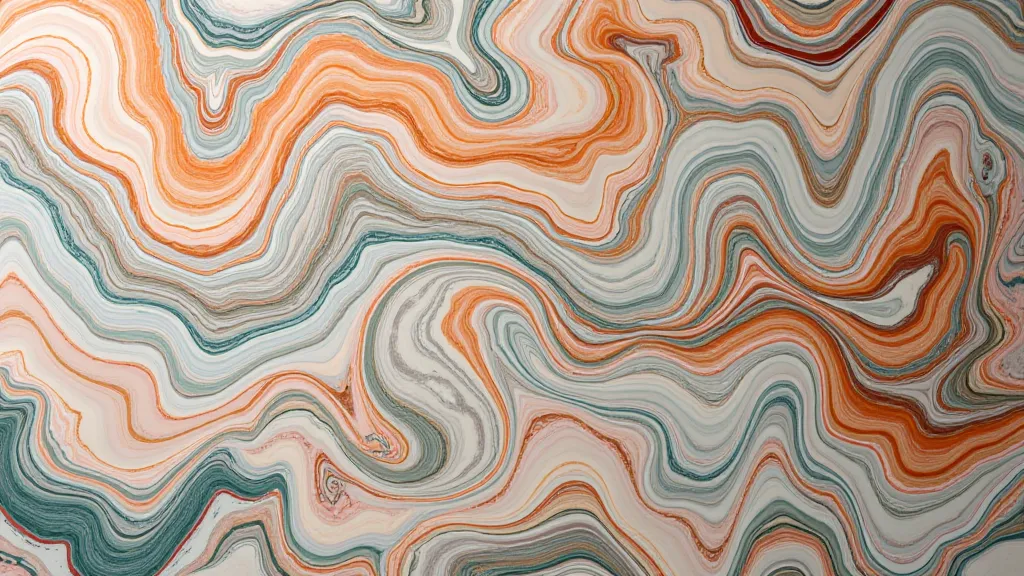
Final Thoughts: Experimentation is Key
Paper marbling is an art that thrives on experimentation. Don't be discouraged by initial setbacks. Carefully observe the results of your marbling sessions, note the conditions, and adjust your techniques accordingly. Keep a notebook to record your findings – it will become a valuable resource as you refine your skills. The beautiful, unique patterns you’re striving for are worth the effort!